How Do I Use XMLSpy to Call Salesforce Web Services? (Magic xpi 3.x)
This topic explains how to call Salesforce Web services outside of Magic xpi as a testing tool and to verify the Salesforce API's behavior.
This can be done with any tool capable of sending soap requests (for example, soapUI). This topic will demonstrate how to send requests to Salesforce using XMLSpy®, enabling you to check login issues, execute SOQL queries, run describeSObjects() operations, work with Upsert operations, and work with the getServerTimestamp.
To use XMLSpy to call Salesforce Web services:
-
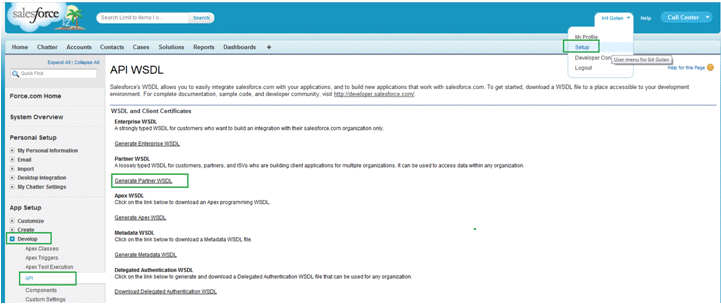
Download the Salesforce WSDL file and save it locally in an easily accessible place. Log in to salesforce.com and select Setup.
-
Go to App Setup > Develop > API, and select Generate Partner WSDL. An XML file will be opened, which you should save locally.
-
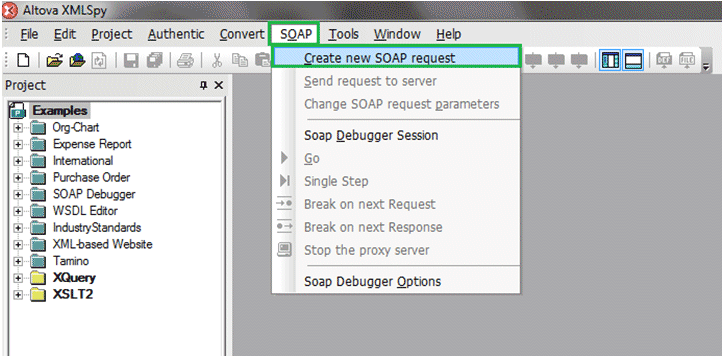
Open XMLSpy and log in to Salesforce using the login operation’s Create new SOAP request. The Web service response will contain a Session ID to be used for further Web service requests (as long as the ticket is still valid).
-
The WSDL file location window opens. Here, select the Salesforce WSDL that you previously saved locally.

-
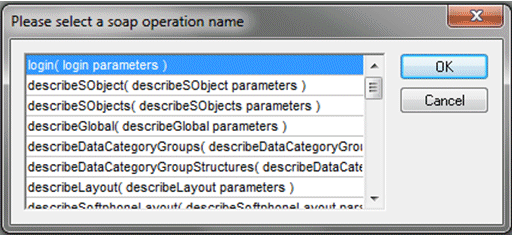
After selecting the WSDL, the Select Soap Operation Name window is opened. Here, select the desired operation. (Note that you will first need to select the login operation to open a ticket at Salesforce.)
-
A login XML is opened:
-
You can delete all the non-relevant elements.
-
Replace the following with your valid Salesforce credentials:
-
<m:username> String</m:username>
-
<m:password> String</m:password>
The login request should look like this:
<SOAP-ENV:Envelopexmlns:SOAP-ENV="http://schemas.xmlsoap.org/soap/envelope/"xmlns:SOAP-ENC="http://schemas.xmlsoap.org/soap/encoding/" xmlns:xsi="http://www.w3.org/2001/XMLSchema-instance" xmlns:xsd="http://www.w3.org/2001/XMLSchema">
<SOAP-ENV:Header>
</SOAP-ENV:Header>
<SOAP-ENV:Body>
<m:login xmlns:m="urn:partner.soap.sforce.com">
<m:username>userName</m:username>
<m:password>Password+Token</m:password>
</m:login>
</SOAP-ENV:Body>
</SOAP-ENV:Envelope>
-
Send the request to Salesforce.

-
If you need to send more Web service requests to Salesforce, you will need to:
-
Create a new SOAP request (see step 3).
-
Select the desired SOAP operation.
-
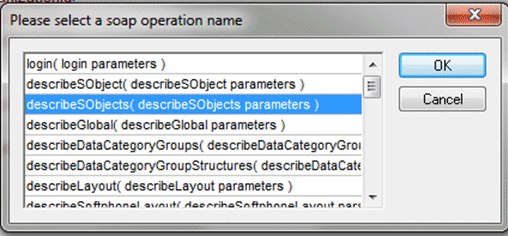
The following steps demonstrate the describeSObjects operation for getting the object’s metadata.
-
An XML is opened:
-
You can delete all non-relevant elements.
-
Replace the <m:sessionId>String</m:sessionId> with the Session ID string from the login WS Result XML.
-
Replace the <m:sObjectType>String</m:sObjectType> with the Object on which you wish to get the metadata. For example, Account.
The describeSObjects request should look like this:
<SOAP-ENV:Envelope xmlns:SOAP-ENV="http://schemas.xmlsoap.org/soap/envelope/"xmlns:SOAP-ENC="http://schemas.xmlsoap.org/soap/encoding/"xmlns:xsi="http://www.w3.org/2001/XMLSchema-instance"xmlns:xsd="http://www.w3.org/2001/XMLSchema">
<SOAP-ENV:Header>
<m:SessionHeader xmlns:m="urn:partner.soap.sforce.com">
<m:sessionId>00D70000000Jv4S!ARoAQB5ijhZCQhFpql4UFcs_qro5mQFg1d9A6_k8aDxniMM4WlaRnq
_KOZudBnsau2GZwLGpBEmhf_PCKbfX7.lnihBsPet5</m:sessionId>
</m:SessionHeader>
</SOAP-ENV:Header>
<SOAP-ENV:Body>
<m:describeSObjects xmlns:m="urn:partner.soap.sforce.com">
<m:sObjectType>Account</m:sObjectType>
</m:describeSObjects>
</SOAP-ENV:Body>
</SOAP-ENV:Envelope>
-
Go to the login Web service response and copy the Server URL string.

-
Park on the describeSObjects request XML and select the SOAP menu, followed by Change SOAP request parameters.

In the SOAP request setting, replace the connecting endpoint with the Server URL String that you copied from the login Web service response (step 11).

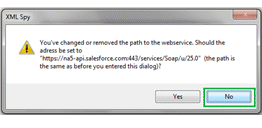
A message window is opened. Select No.
-
Send the request.

Another XML opens. This is the Web service response.

|
Note:
|
Although the above procedure can be carried out with any tool capable of sending SOAP requests (such as soapUI), this document describes how to use XMLSpy only.
|

