Understanding Web Modules
This topic introduces you to Web Modules in xpa and throws light on how you can use them.
Philosophy behind Introducing ngModule
As applications started to become more and more complex, it became evident that all applications should be divided into modules. Each module is a small mini application on its own, and now you can bundle these mini-applications to make your large application.
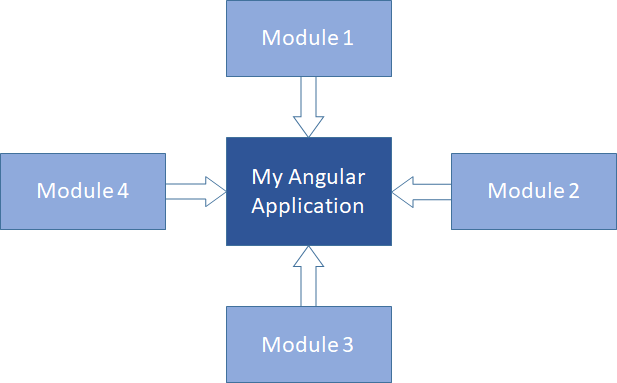
Angular's answer to creating modules is @NgModule, which is the tag that allows you to create a module. A module in Angular consists of components or other module's components.
NgModules configure the injector and the compiler and help organize related things together. An NgModule is a class marked by the @NgModule decorator. @NgModule takes a metadata object that describes how to compile a component's template and how to create an injector at runtime. It identifies the module's own components, directives, and pipes, making some of them public through the exports property so that external components can use them. @NgModule can also add service providers to the application dependency injectors.
NgModules consolidate components, directives, and pipes into cohesive blocks of functionality, each of which is focused on a feature area, application business domain, workflow, or common collection of utilities.
-
Modules are a great way to organize an application and extend it with capabilities from the external libraries.
-
Modules can also add services to the application. Such services might be internally developed. For example, something you would develop yourself or comes from the outside sources such as the Angular router and HTTP client.
-
Modules can be lazy loaded asynchronously by the router.
Web Module in xpa
Web Module in xpa is derived from the idea of NgModule in Angular.
A Web Module is a logical unit that includes all the Magic components for a particular folder which is also known as module. While your app is growing, you can organize the code relevant to a specific feature into a folder. This applies clear boundaries for the features. With Web Modules, you can keep code related to a specific functionality or feature separate from the other code. Delineating areas of your app helps with collaboration between developers and teams, separating the directives, and managing the size of the root module.
Magic xpa provides you the functionality of creating an independent Web Module per Magic folder in a Web Client application. This allows you to treat the folder in such a manner that the folder is identified as a separate logical unit, which you can load on demand. This enhancement will improve the web application performance as you can load only the desired folders thereby saving computing resources.
Root Module vs. Web Module
Inheriting the concept of root module and feature module, in Magic xpa there are two types of modules:
-
Root module, which is the entry point of your app. You can technically put everything in your app into just one module.
-
Feature modules, which are used for separation of concerns during development, but also for things like lazy-loading of parts of the app. This is more of an issue for larger apps, but doing it early can certainly help you set-up the things clear and right.
A Web Module delivers a cohesive set of functionality focused on a specific application need such as a user workflow, routing, or forms. While you can do everything within the root module, web modules help you partition the app into focused areas. A web module collaborates with the root module as well as with the other modules through the services it provides and all the components, directives, and pipes that it shares.
Correlation of Magic Folder Structure with Angular
Everything generated by AngularCLI is placed in the folder src\app directory by default. An Angular project is the set of files that comprises a standalone app, a library, or a set of end-to-end (e2e) tests. An Angular workspace contains the files for one or more projects. Similarly, when a Magic Web Client project is generated, everything is placed in the folder Projects\<project_name>. The structure of a Magic Web Client project’s folder is same as an Angular project’s folder.
Magic Folders with and without Using the Is-Web-Module Property
Today, if the root program of xpa contains folders, then the component-list.g.ts file from the generated \magic folder contains the entries of all the programs present outside the folders.
If the root program contains a Web-Module-enabled folder then you find the two ts files created inside the folder:
1. component-list.g.ts, which contains the list of programs present in that particular Web-Module-enabled folder.
2. magic.gen.lib.module.ts
Web Module Property
You can create an independent Web Module for a Magic folder using the Web Module property. Say, you need to generate a Web Module of a folder. Right-click on the desired folder, and select Properties option (Alt + Enter), which opens a dialog box as shown:
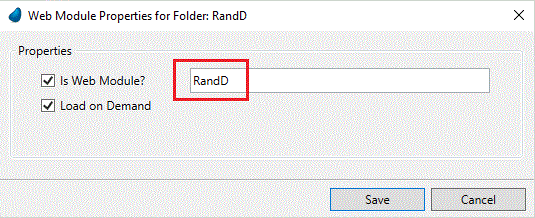
The Web Module Properties are:
|
|
|
|
Is Web Module?
|
When this field is checked, an independent Web Module is created for that folder.
|
|
Name
|
It is the name of the folder as long as 30 characters. It is unique within a Web Client project and is populated with Folder name.
|
|
Load on Demand
|
When this field is checked, the Web Module folder is created on demand. The programs inside this module need to be called through Routing. The execution of an individual program inside the module is not possible.
|
|

|
The programs opened in a Subform which are present in Load on Demand folder can only be accessed through Routing. Since version: 4.7
|
Web Module Generation Process
For generating a Web Module for a folder under Programs repository, you need to set the Web Module properties.
Steps to Generate Web Module
1. Go to Programs repository.
2. Decide for which folder you need to create a Web Module.
3. Right-click on the desired folder.
4. Select Properties option (Alt + Enter).
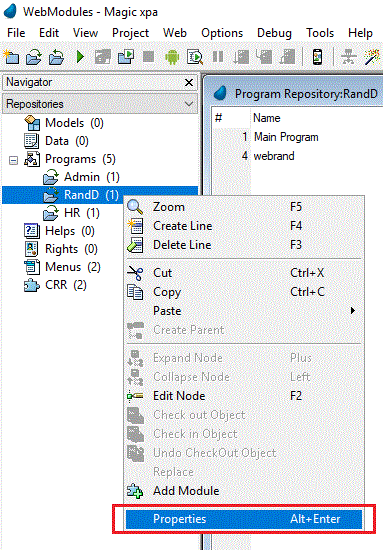
This opens Web Module Properties dialog box as shown:
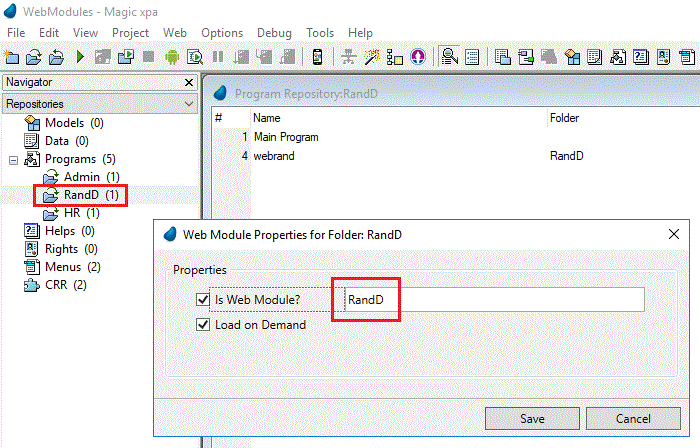
You can see the folder name in the title bar and next to the first checkbox by default.
5. Check the checkbox Is Web Module?. Magic gives a default name that it inherits from the folder name.
6. Enter a new name for the Web Module or leave the default name as it is.
Note: The folder name and the Web Module name can be same or different. You must avoid entering any special characters in the name or using the same name that you have used for a folder previously.
7. Now when you generate your Web Client project, it creates two files in the folder for which you checked the checkbox Is Web Module?.
-
component-list.g.ts
-
magic.gen.lib.module.ts
8. Now check the checkbox Load on Demand. You will get to see three files created in this case:
-
component-list.g.ts
-
magic.gen.lib.module.ts
-
app.routes.ts
Note: The programs that are in Load on demand folder:
Web Module Generation Scenarios
For example, consider a situation. You have three folders under Programs Repository – HR, Admin, and RandD, each of them contain some Web Client tasks. Consider the folders have been set with different properties as given:
|
|
|
|
|
Admin
|
Unchecked
|
Unchecked
|
|
RandD
|
Checked
|
Checked
|
|
HR
|
Checked
|
Unchecked
|
When you generate the application, you will see the following files in accordance with the three folders as given:
Case Folder \Admin
Here you have chosen neither to create a Web Module and nor to load it on demand. There is no change in the behavior means the TS files created earlier in the folder \magic are used.
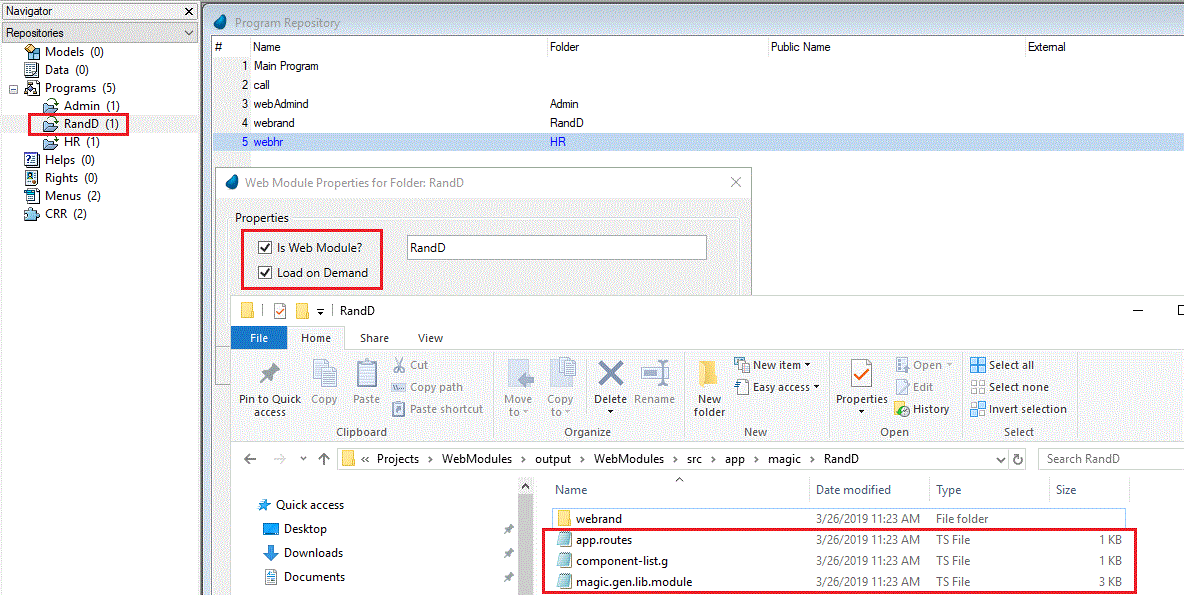
Case Folder \RandD
You have chosen both; to create a Web Module and to load it on demand. In such case, the following three files are created in the folder \RandD:
-
component-list.g.ts
-
magic.gen.lib.module.ts
-
app.routes.ts
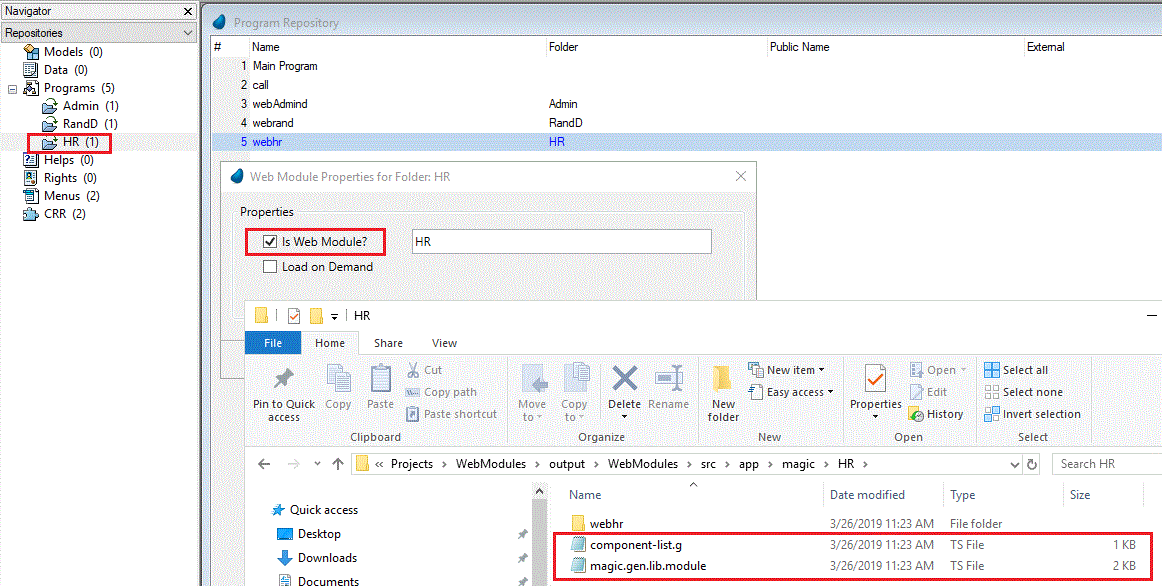
Case Folder \HR
Here since only Is Web Module? is selected, the above said two files are generated at the following location in addition to the files created in the \magic folder by default:
 component-list.g.ts
 magic.gen.lib.module.ts
Accessing Overlay Window from Load on Demand Folder
The programs in Overlay window present in Load on demand folder can be accessed without Routing. Since version: 4.7
The following steps are handled in Magic xpa to access the programs in Overlay window present in Load on Demand folder:
1. 1. Magic xpa generates a LazyLoadModulesMap in component-list.g.ts and sets-in on the service.
For example, if you have an Overlay program in RandD module which is set to load on demand, then the map will be as
follows:
|
export const LazyLoadModulesMap = {
Prg1_Prg1 : { moduleName : 'MagicRandDModule',
modulePath : 'src/app/magic/RandD/magic.gen.lib.module'}
}
|
It denotes that for the component Prg1_Prg1 the moduleName is MagicRandDModule and the modulePath is
'src/app/magic/RandD/magic.gen.lib.module'.
These maps contain the maps of all Overlay programs, which are set as Load on Demand.
The generated LazyModulesMap is required to be set on the ComponentListMagicService in Magic.gen.lib.module as follows:
|
componentList.lazyLoadModulesMap = LazyLoadModulesMap
|
2. From version 8 onward, Angular provides the ability to load the modules on demand without using Routing. To avail this ability, you can specify
modules in lazyModules[] of angular.json.
In Magic xpa when the Overlay is under Load on Demand, it will be added to lazyModules[] of angular.json in generation process.
For the same example, angular.json will be modified as:
|
"lazyModules": [
"src/app/magic/RandD/magic.gen.lib.module"
]
|
The path in lazyModules of angular.json must be same as the path provided in LazyLoadModulesMap.

