How to set OAuth2 Configuration and Register a Dynamics CRM Application in the Azure Portal? (Magic xpi 4.14)
You will require to perform the following steps and rights before using Dynamics CRM resource using OAuth2 authentication in Magic xpi.
Follow the steps given below:
-
Go to https://portal.azure.com/#home
-
Navigate to the Azure Active Directory admin center and login using your Microsoft account details.
-
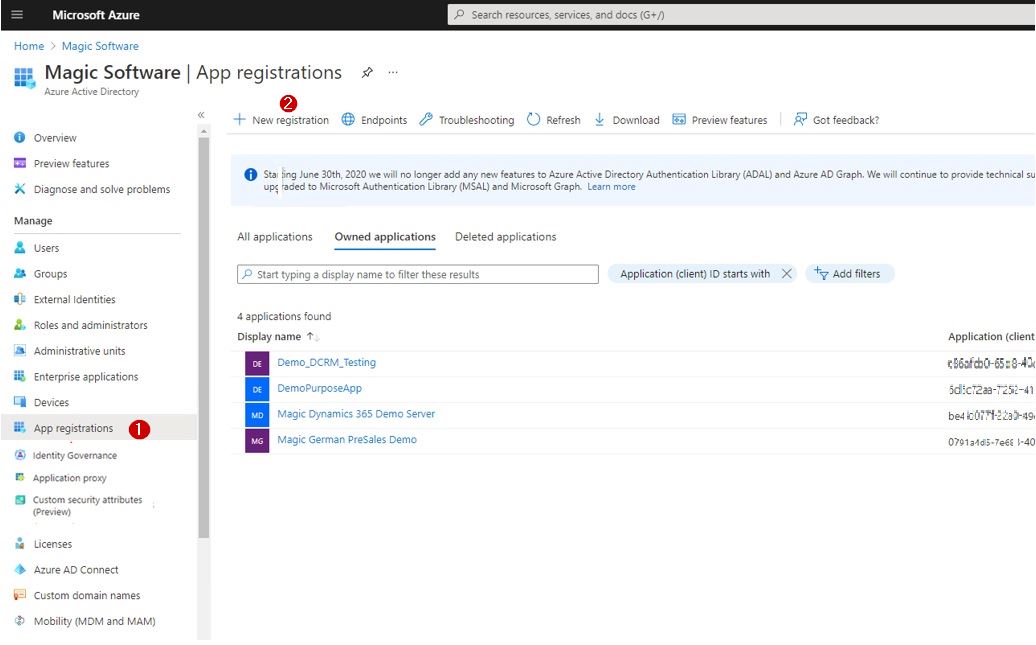
In the left-hand pane, navigate to the Manage section and select App registrations.
-
Select New registration.
-
It will take you to the Register an application page, set the values as follows:
-
Enter Name for your app.
-
From the Supported account types select the option that suits you best.
-
Enter Redirect URI if required.
-
Click Register. As you click the button, you will find your Application (Client) ID and Directory (Tenant) ID. These are Client ID and Tenant ID for Dynamics CRM resource. Save these values as they will be required for configuring the Dynamics CRM resource in Magic xpi studio.

-
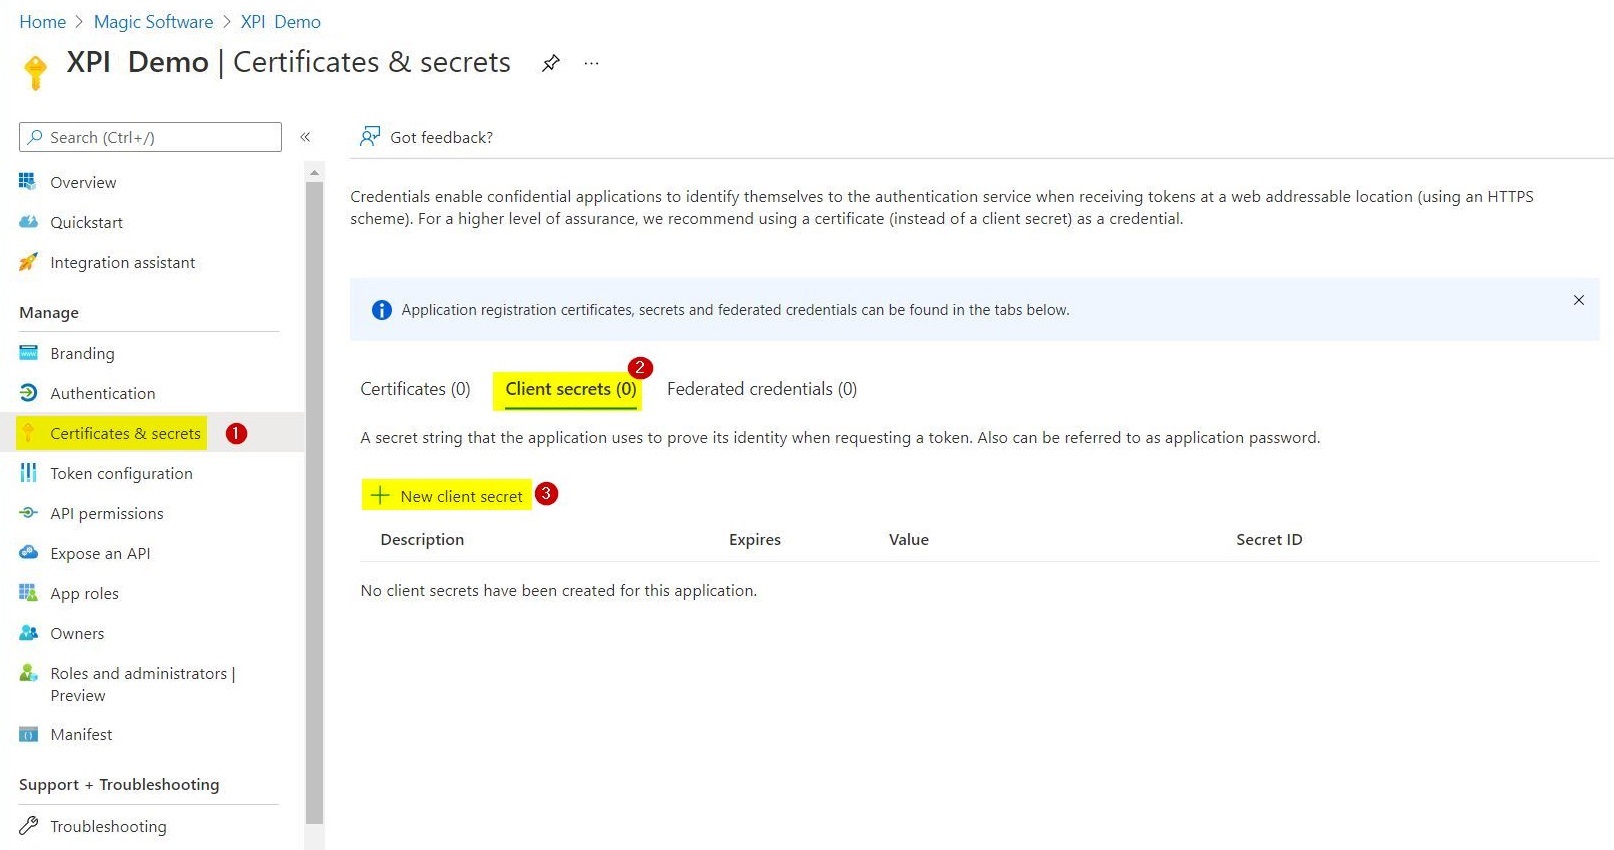
While parked on the same window, from the Manage section select the Certificates and secrets option.
-
From the right hand pane park on Client secrets. Click New client secret button.
-
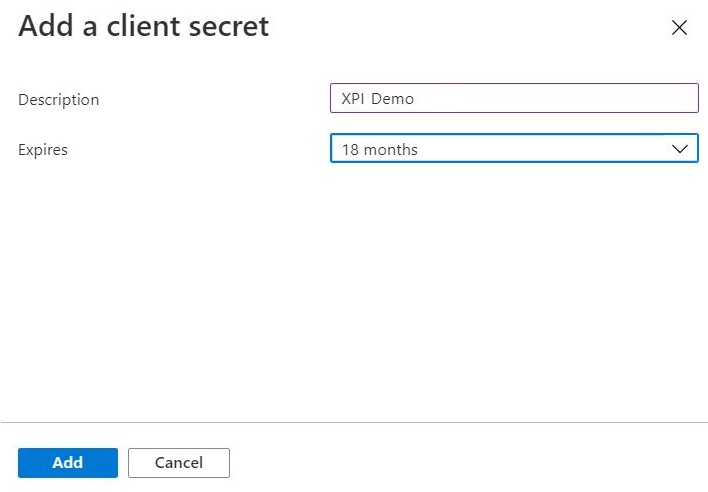
This will open a window labelled as Add a client secret.
-
Here enter Description and from the Expires drop-down menu select the required value.
-
Click Add button given at the bottom of the page.
-
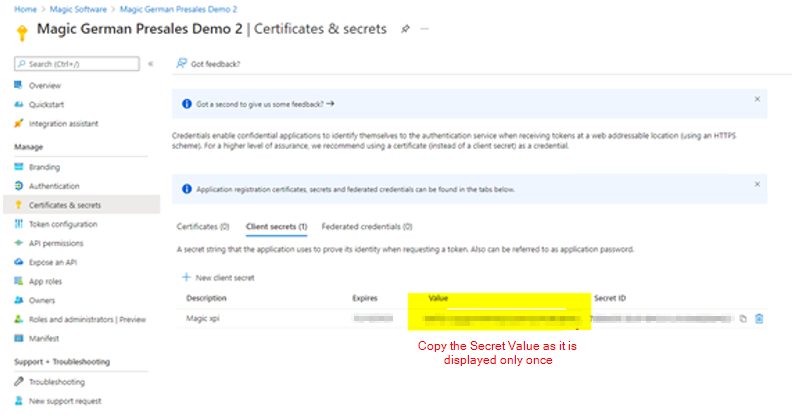
With this Secret Value and Secret ID will be generated. These values will be also required for configuring the Dynamics CRM resource in Magic xpi studio.
|

|
Copy the Secret Value as it is displayed only once.
|
Now go to the Power Platform admin center: https://admin.powerplatform.microsoft.com/environments
-
From Environments, select the required environment, for example, Magic EU Production.
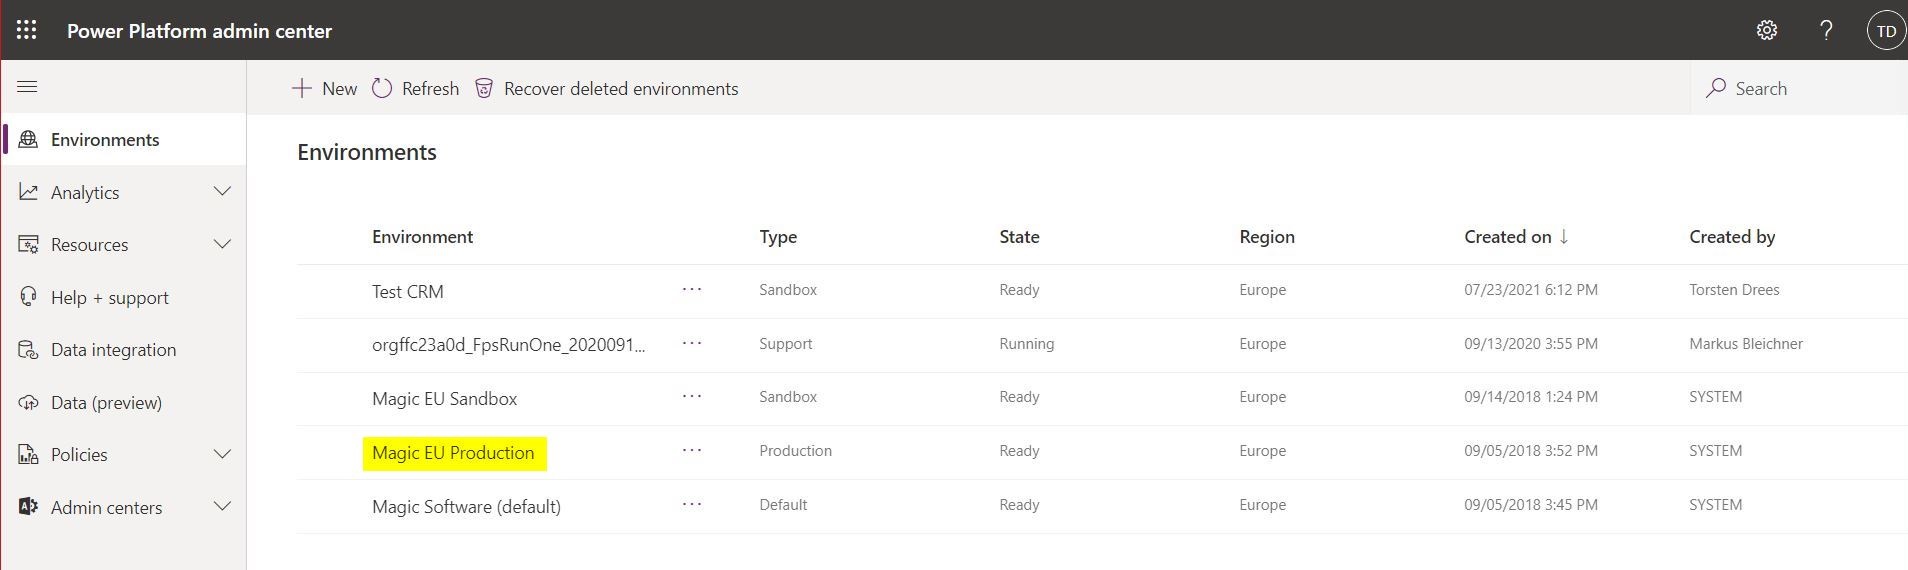
-
Then go to Settings. Here note the Environmental URL which is used as a Server URL in Magic xpi Dynamics CRM resource. Also copy the Organization ID required for the resource configuration.
![]()
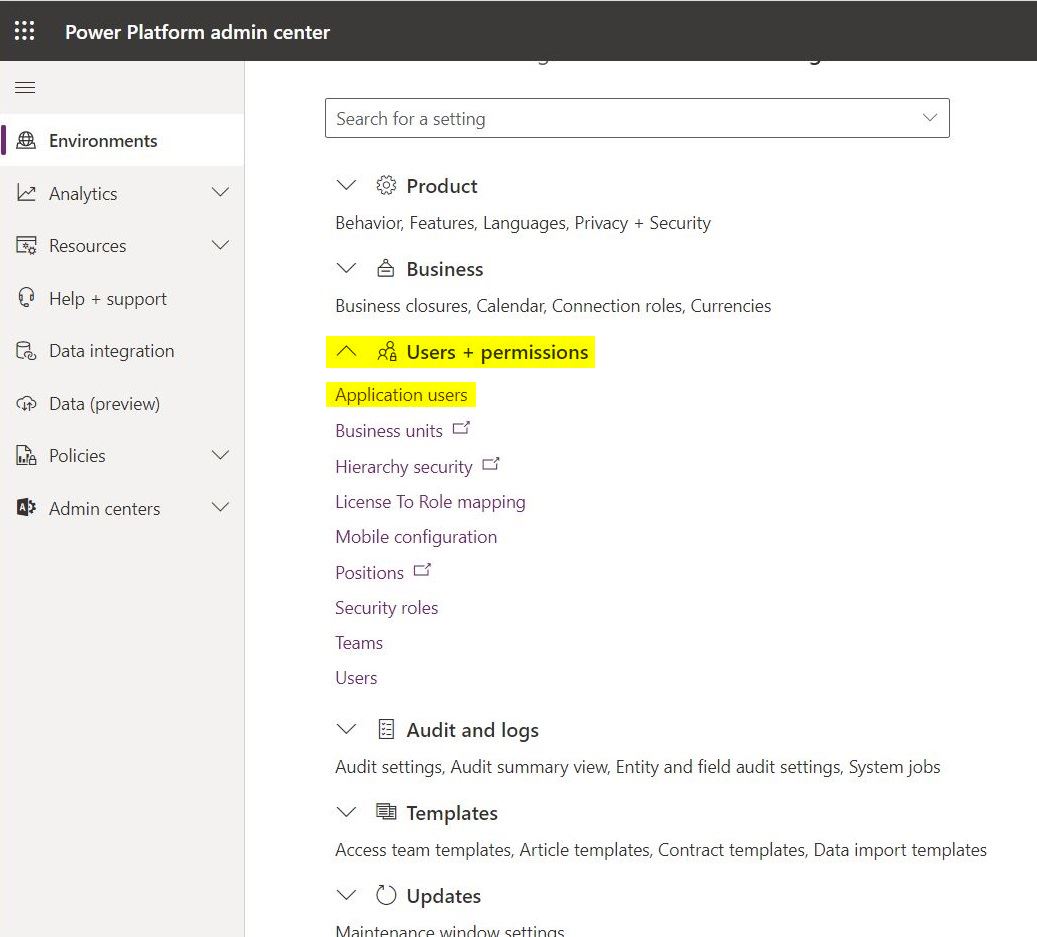
-
Expand the User + permissions menu and select Application users.
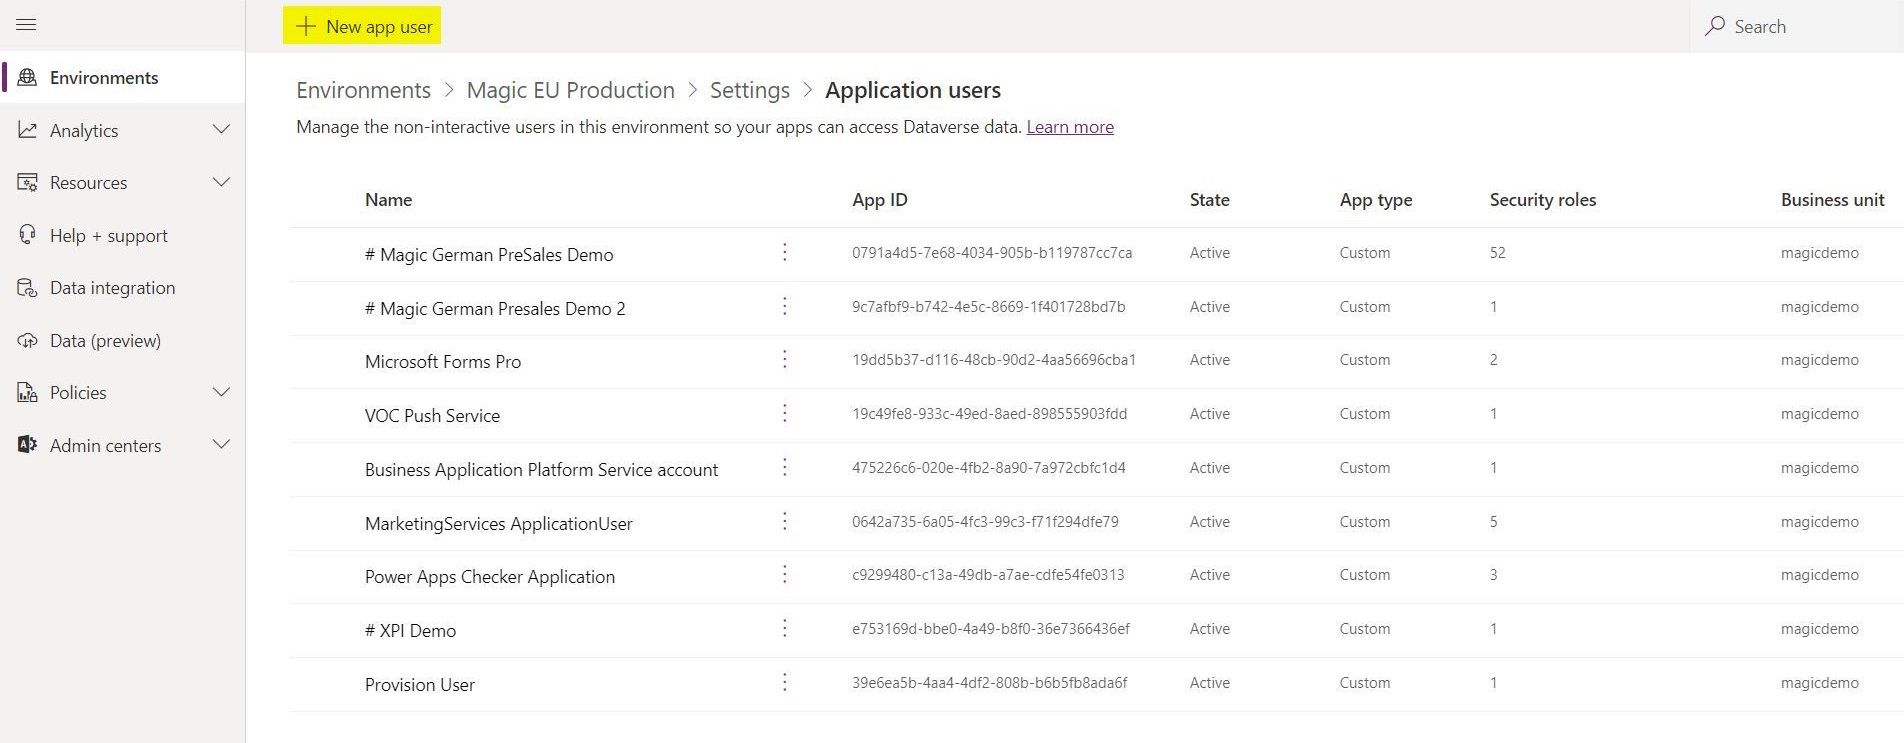
-
Now click the New app user button.
-
This will open a new window called Create a new app user. Here click, the edit button named Add an app.
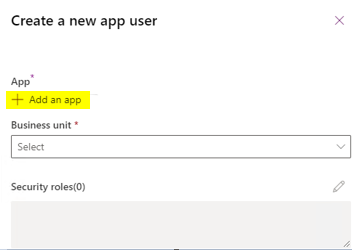
-
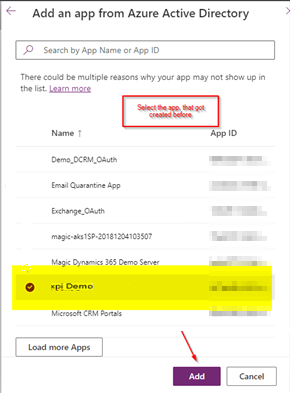
From the Add an app from Azure Active Directory, select the App ID that was created earlier and click the Add button.
-
This will take you back to the Create a new app user window. Here select the Business unit from the drop-down menu. Next, click the edit button against Security roles and select System Administrator and click Create button.
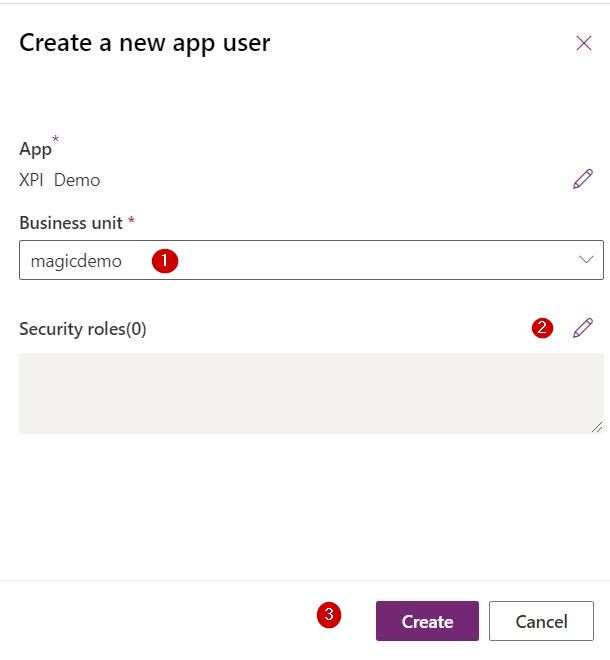
With this your application user will be crated successfully.
Dynamics CRM Resource
https://docs.microsoft.com/en-us/azure/active-directory/fundamentals/active-directory-how-to-find-tenant
https://docs.microsoft.com/en-us/powerapps/developer/data-platform/walkthrough-register-app-azure-active-directory
https://docs.microsoft.com/en-us/azure/active-directory/develop/quickstart-register-app
