How Do I Load a Component Into My Project? (Magic xpa 2.x)
Before you can load a component into a project, you need to have created a Magic xpa Component Interface file, or .eci. This is a text file that is used to load the component into a project. You can see how to create the .eci file in Creating a Magic xpa Component.
Once the .eci file is created, do the following steps to make the component available to your project.

-
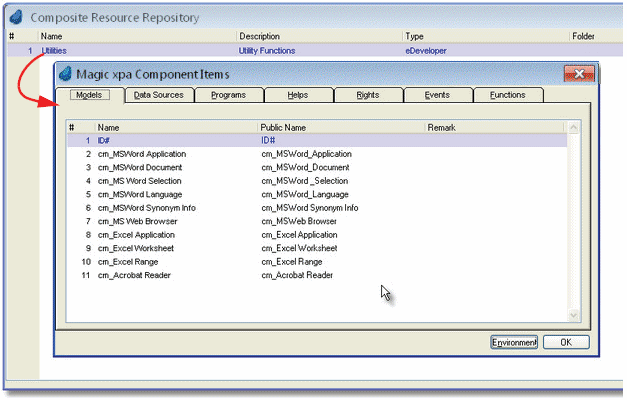
Select Project->CRR (Shift+F7). The Composite Resource Repository will open.
-
Press F4 (Edit->Create Line) to open up a line. Type in a name for the component you are going to use. This name doesn’t have to be the same as the name of the component: it is for documentation only.
-
Zoom (F5 or double-click) to select the .eci file that describes this component.
-
Now, when you zoom again, you will see a list of all the component items. There is one tab for each of the items in the component, plus a button at the bottom that will bring up the environment setup for the component.
-
You can zoom on each of the items in these lists to get more information about them, such as the Model properties or the arguments for a program. However, you cannot change any of the objects from within this project; you can only use them. All changes are done in the component.
Now, you can use any of these items inside your project just as you would use any other object. When you select, for instance, a Model, you will see the Models on this component list on the same list as the Models that are in that project.
Note: You don’t need the .eci file at runtime. You do have to make sure the component is in the same relative location, but once the component is brought into the project, the .eci file is not used.

