How Do I Implement Styles and Classes? (Magic xpa 4.x)
Within HTML, there are several different ways to implement styles and classes. For instance, you can:
-
Add color and font attributes to each field tag.
-
Use classes to access Styles to apply to multiple tags.
-
Use Style sheets to apply Styles to multiple HTML files.
-
Use Scripts to change fonts and colors interactively
If you are using Magic xpa, these HTML options still exist, and in addition you can access the coded HTML features from within Magic xpa. Additionally, you can use styling within Magic xpa independently of any HTML code.
Which option you want to use might depend on how much flexibility you need, and on the general design of the system. As a general principle you want the system to be as easy to maintain as possible, so keeping most formatting at a high level -- using Magic xpa Models and/or HTML Style sheets -- is the best approach. But some individual fields won’t fit into any one Style, so you will want to format them at the field level.
Let’s see some of the ways to implement styles and classes in Magic xpa.

Normally, the style sheet will be in a separate CSS file, so it can be used with multiple web pages. In our example, all the programs use the same simple style sheet, shown above.
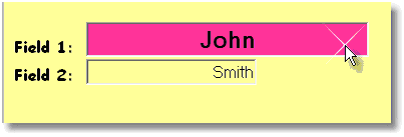
The styles are used to create a simple web effect such that when the cursor hovers over an input field, the field gets big and turns pink, as shown here, where the cursor is hovering over Field 1.
Now we’ll see three different ways to code this effect.
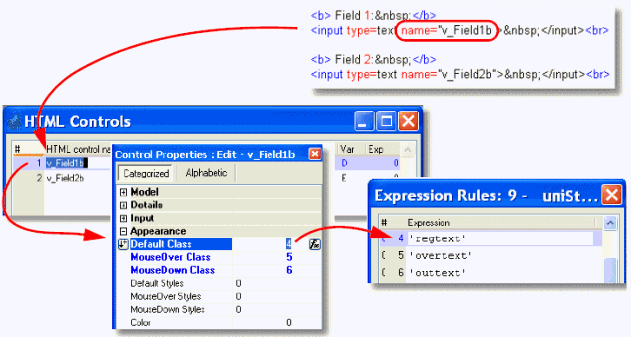
This example works exactly like the last example, except instead of coding the class names in the HTML, we have added them to the Control Properties for the field. Each control property points to an expression, which is the name of the class.
The expression can point to a global virtual which evaluates to the style name also, so the exact style name doesn’t need to be entered in different programs.
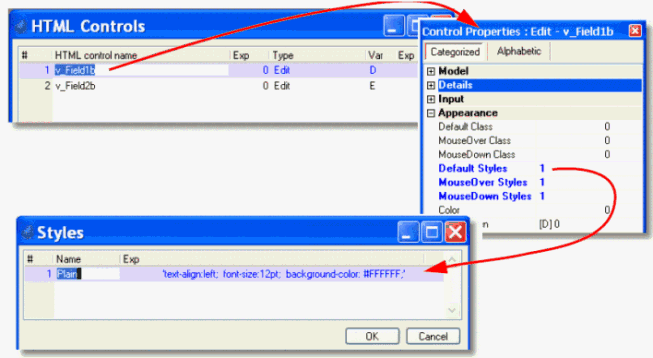
Here, we have a program that runs just like the previous two. However, it doesn’t use a style sheet at all. Instead, the style is coded inside Magic xpa only. Zooming on the Default Styles, MouseOver Styles, or MouseDown Styles properties brings up a dialog where you can code the actual styles as Expressions. The style entered here is the same string that was used in the CSS style sheet shown earlier. It could also be held in a global variable. The Style Name to the left is for documentation only.
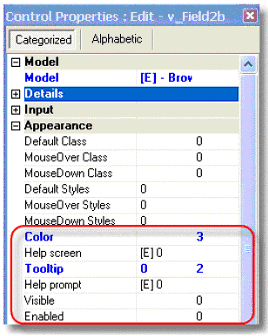
Another option is to use the other Magic xpa properties, rather than using the HTML styles. These properties give you a lot of runtime control over the HTML, without coding anything extra into the HTML.
This set of properties works in the browser much as the same properties work in Magic xpa client server.
For instance, using the Color property, you can use an expression to set the color of the field based on values of other fields. This option uses the Magic xpa colors found in Options->Settings->Colors, rather than using the HTML color settings.
The Help screen property allows you to point to a URL Help entry, so that when the user presses F1, the user can see a new window containing the help screen for this field. Tooltip allows you to point to a Tooltip help entry, or simply enter an expression to display a tooltip.
You can use the Visible property to make the field appear only in certain circumstances, and Enabled to allow or disallow data entry.
