How Do I Define Task Variables? (Magic xpa 4.x)

There are three kinds of task variables in Magic xpa:
-
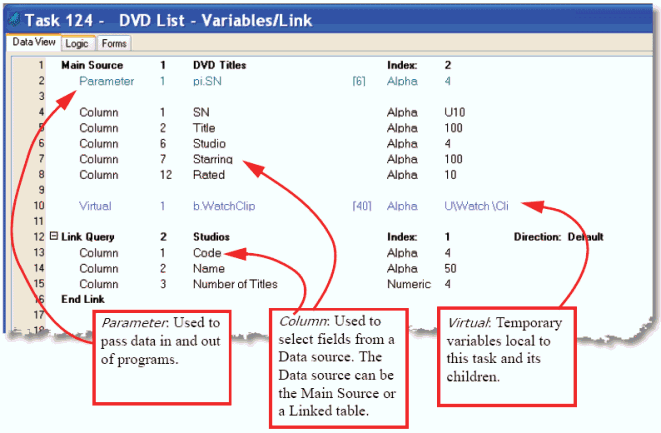
Parameters are used to pass data in and out of a program. These are entered the same way as virtuals are. In our example we are passing in the studio number (“SN”).
-
Columns are fields that are selected from a data source. In Magic xpa, a data source can be an SQL table, a memory table, or even an XML file, but they are all handled the same way. In our example we are selecting columns from the Main Source (the DVD table) and a Linked source (The Studio file).
-
Virtuals are temporary variables that will be used only in this task or its children. In our example, we are using a virtual to create a parkable push button.
Once they are declared, each of these variable types works identically in Magic xpa. The main differences have to do with what happens to the data after the task ends.
Parameters are explained in more detail in the How Do I Define the Incoming and Outgoing Arguments in a Program? topic. Below you will see how to enter Columns and Virtuals.

-
If you are creating a column in a Linked source, position the cursor between the Link and End Link. Otherwise, the column will be assumed to be from the Main Source.
-
Press F4 (Edit->Create Line) to open up a line.
-
Type C for Column (or select from the pull-down list). Tab.
-
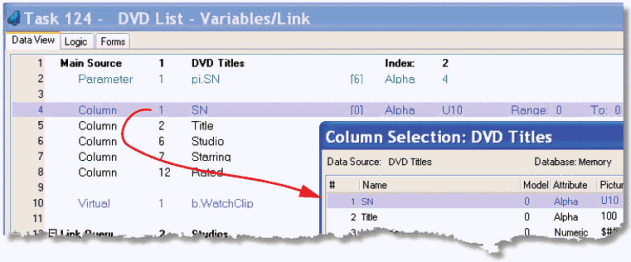
Zoom (F5 or double-click) to select the column you want, or just type it in. Tab.
-
You can change the name if you like by typing over it. This is sometimes useful, especially when, as in this example, you have more than one variable with the same name. Changing the name in the Data View doesn’t affect the Data Source table.
That is all there is to it. Since the properties of the columns are set up in the Data Source table, you don’t need to specify them here.
See also: How Do I Define a Range for a Task’s Data View?

-
Position the cursor where you want to create a virtual. They can be created anywhere.
-
Press F4 (Edit->Create Line) to open up a line.
-
Type V for Virtual (or select from the pull-down list). Tab.
-
You will now be on the variable name. Type in any name you like, then Tab.
-
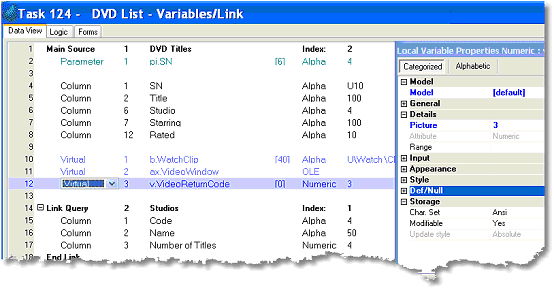
Now you are on the Model field. This field is in brackets, and it is the number of the Model used for this field. In our example, the “b.WatchClip” field uses Model 40, but the v.VideoReturnCode does not use a Model.
Using a Model will save you time and make your code more maintainable.
To select a Model, zoom (F5 or double-click) to select the Model you want.
Now, if you are using a Model, the rest of the properties for the virtual are already set up. You can override the defaults, if you like, but if the Model is well-thought-out, you can just use it.
If you are not using a Model, tab and continue to the next steps.
-
The field after Model is the Attribute field. Here you select the variable’s Attribute, which you can choose from a pull-down list, of Alpha, Numeric, Date, Time, OLE, etc. Now Tab to the next field.
-
Now you are in the Picture field. Enter the Picture for the field. If you need more assistance, press zoom and a Picture dialog will help you.
At this point, the virtual should be usable, though some, like the OLE objects, are more complex. You can go to the Properties Pane (Alt+Enter) and set up more details for the virtual, if needed.
The Online and Rich Client Samples projects (program DV05 and RDV05)

