How Do I Customize the Appearance of the Verify Operation Screen? (Magic xpa 2.x)

The Verify operation is an easy way to give information to your users, and also to return the user choices back to the program. There are two modes for Verify, Verify Error and Verify Warning. Each of them can be customized to suit the needs of the program.

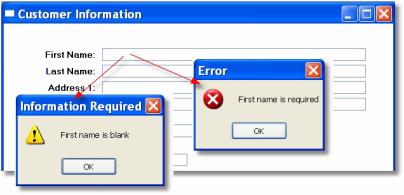
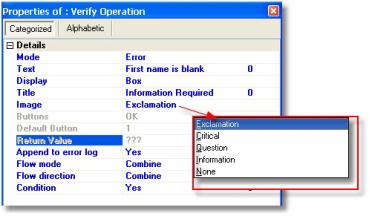
For a Verify Error, the text and title bar can be modified, by either typing in new values or creating an expression. You can also change the image, using one of the five image choices.

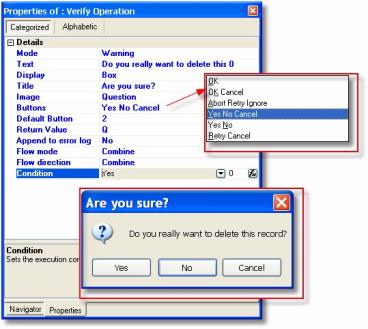
For a Verify Warning, you can also change the push button configuration, and capture the value that reflects which choice the user made. Note that this Verify window uses a Microsoft object, so the object itself, and the results sent back, are set by the operating system.
Here, the Buttons property is set to Yes No Cancel, the default button is set to the second button, and the numeric variable Q is used to hold the result. The values returned are: Yes=6, No=7, and Cancel=2. You can read more about the choices and how to use them by accessing the Magic xpa Help while in the Verify properties.
The Online and Rich Client Samples projects (program TS33 and RTS33)

