How Do I Create a Provisioning File to Compile My iOS App? (Magic xpa 4.x)
To set up your Magic xpa Mobile iOS Development environment, you need to have the following:
The first step is to set up the certification of your iOS development environment.
-
Log in to your Apple Developer account (http://developer.apple.com).
-
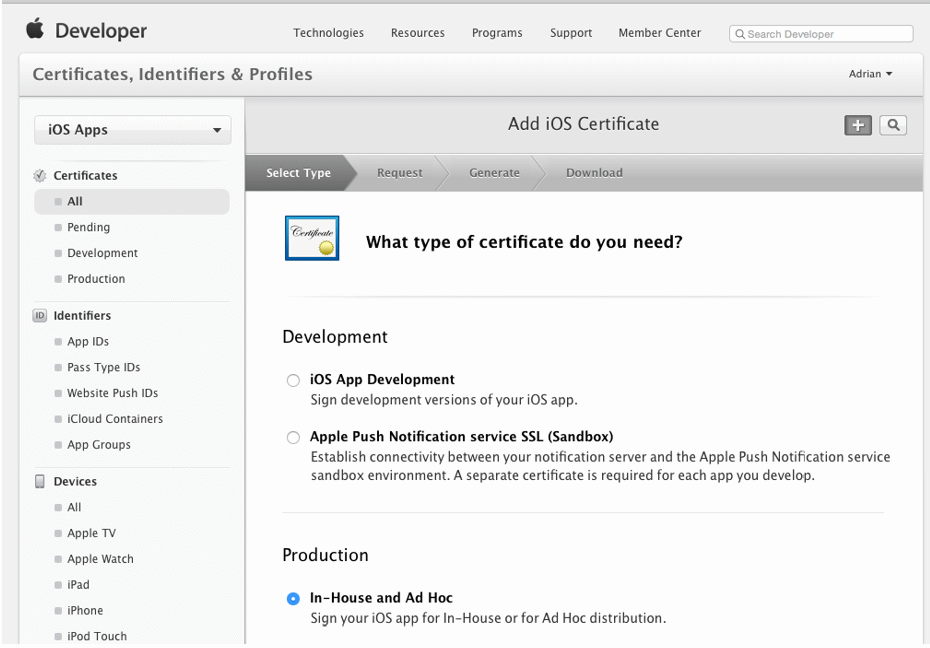
Under iOS Apps, in the Certificates section, click All.
-
In the Add iOS Certificate screen, in the Production area, select the type of certification that you want. Here, we've selected In-House and Ad Hoc.
-
Click Continue.
-
You will then be prompted to create a certificate request. Click Continue.
-
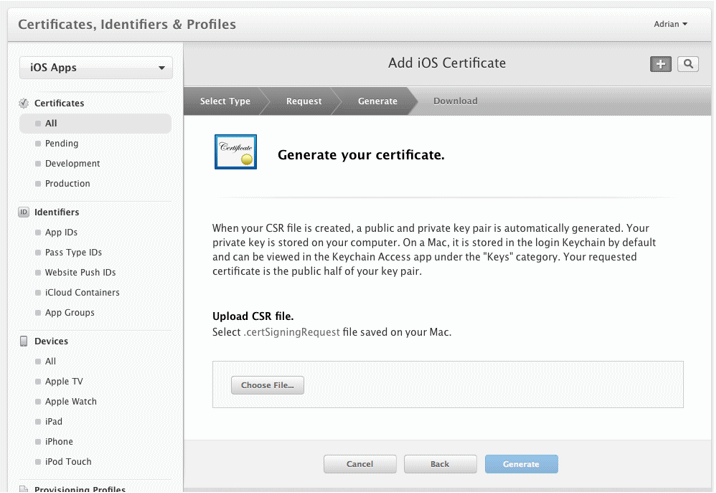
On the next screen, you will be prompted to generate a .certSigningRequest file. This file is generated on your Mac machine and will be uploaded during this step of the process to link your Mac machine with your Developer account.
-
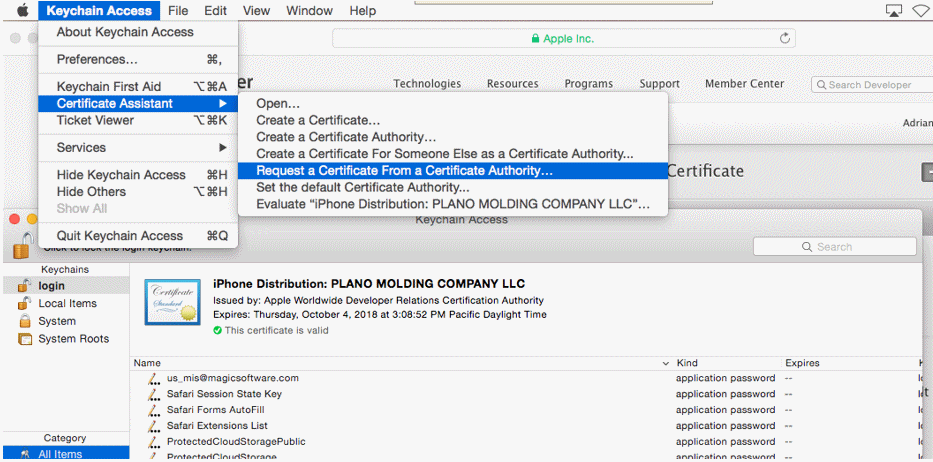
To generate the .certSigningRequest file, open your Keychain Access application on your Mac machine. Click the Keychain Access context menu, select Certificate Assistant, and then Request a Certificate From a Certificate Authority.
-
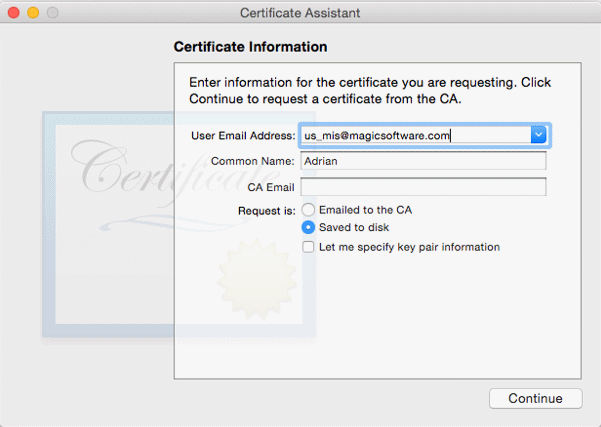
On the next screen, enter your Apple Developer account email, and select Saved to disk.
-
Click Continue to save the file to your local disk. This is your .certSigningRequest file.
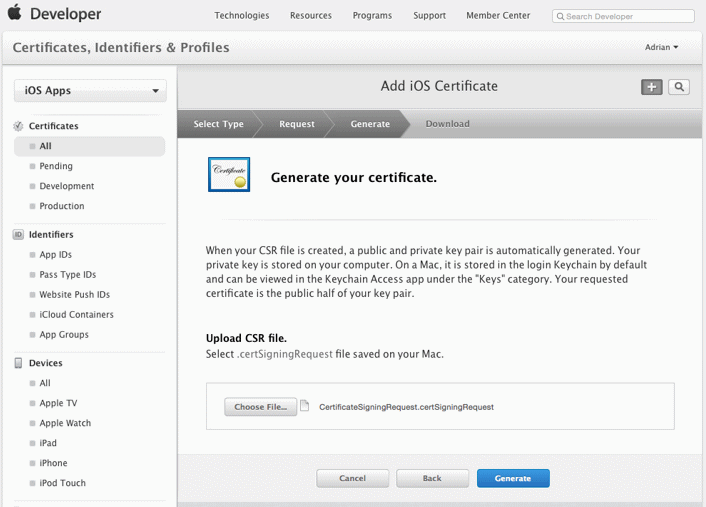
-
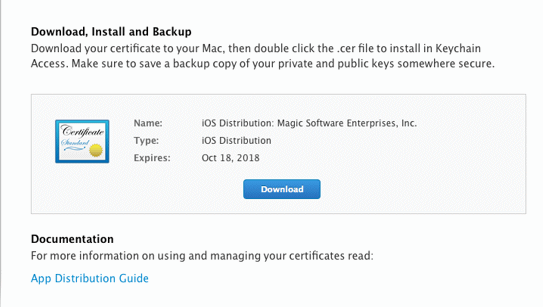
Next, download the certificate from the portal.
-
Double-click the downloaded .cer file to install the certificate. You can view it in the Keychain Access utility.

After the certification process has been completed, your Mac development environment is now certified with your Apple Developer account and, as a result, with the Apple Developer Portal.
Next, you need to define the applications that will be created under your Apple Developer account.
-
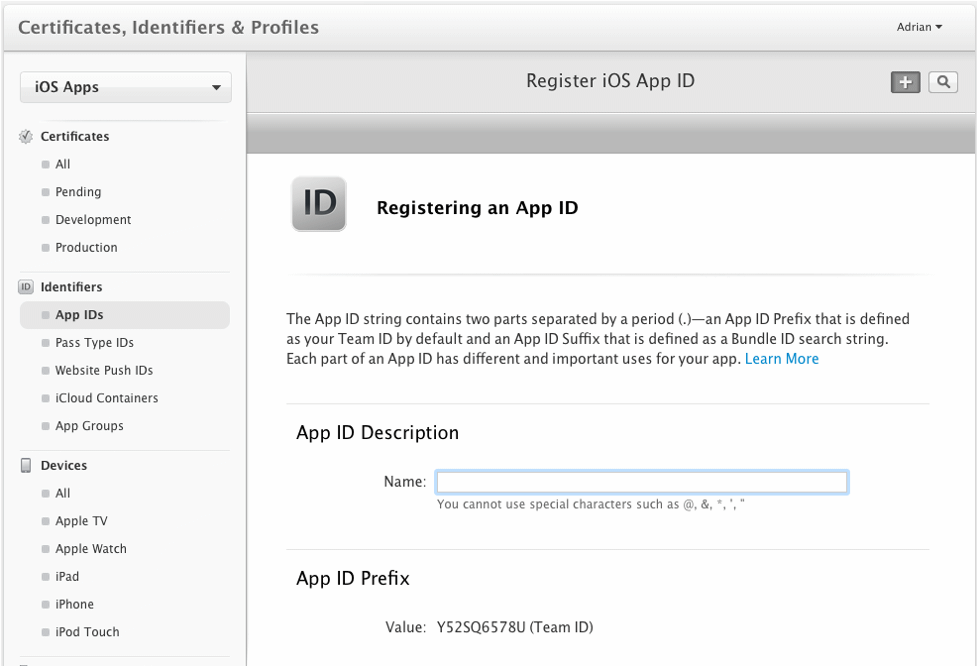
Under iOS Apps, in the Identifiers section, click App IDs.
-
In the next screen, define the following:
-
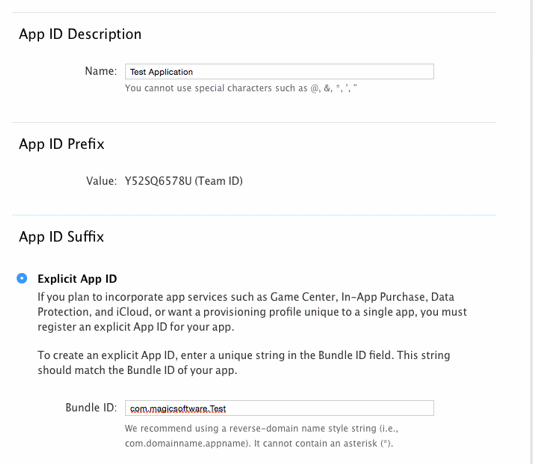
The App name. This is for description purposes in the Apple Developer Portal.
-
The App ID. This is the key that links your Xcode project and the application definition in your Apple Developer account. This is a unique ID throughout all iOS applications. As recommended, place the Bundle ID under the com.domainname.appname style.
-
The application services. This lets you enable and enroll your project to use the available Apple services.
-
Click Continue.
-
On the next screen, click Submit. This creates the application instance in your Apple Developer Portal.
After creating the Application Identifier, the last step is to create a provisioning profile for your application. The provisioning profile defines how your application will be used and distributed.
This part of the process will provide you with an application provisioning profile that will create an application definition, under your Apple Developer account certificate, on your development machine.
-
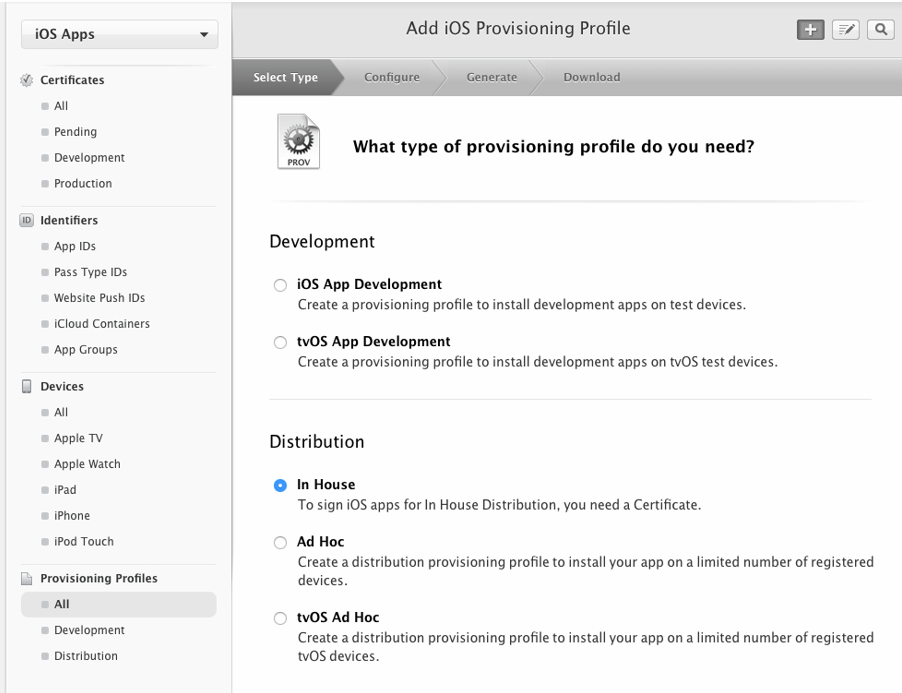
Under iOS Apps, in the Provisioning Profiles section, click All.
-
This example involves creating an enterprise application that will be distributed internally. Therefore, in the Distribution area, you should select In House.
-
Click Continue.
-
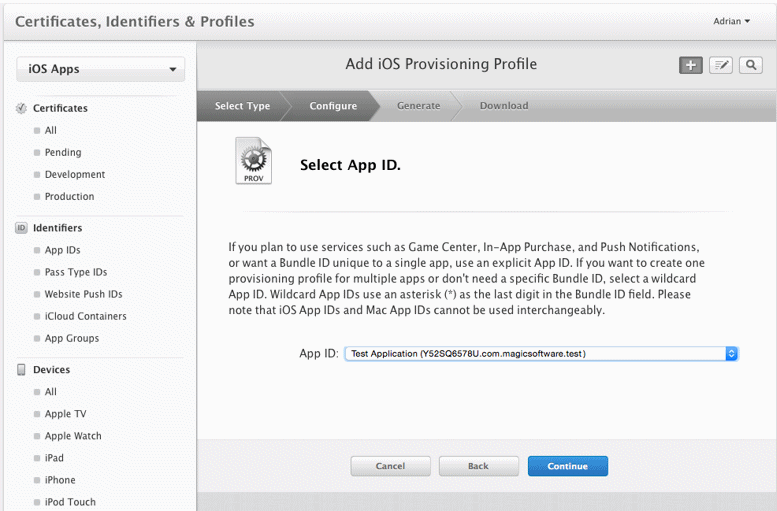
To define which application (from the App ID archive in your Developer Portal) this provisioning profile is intended for, select the application that you created earlier. Each provisioning profile is bound to only one application.
-
Click Continue.
-
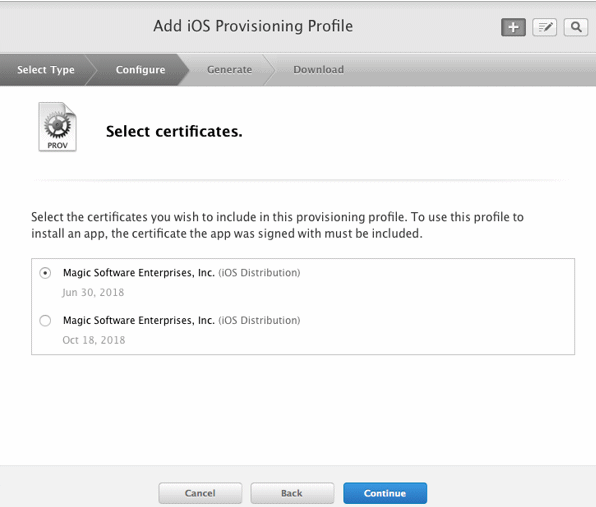
Next, select the certificate that this provisioning profile will be associated with. This ensures that only an authorized development machine, or a machine with the Apple Developer account’s certificate installed on it, can create the .ipa file or the iOS application installer.
-
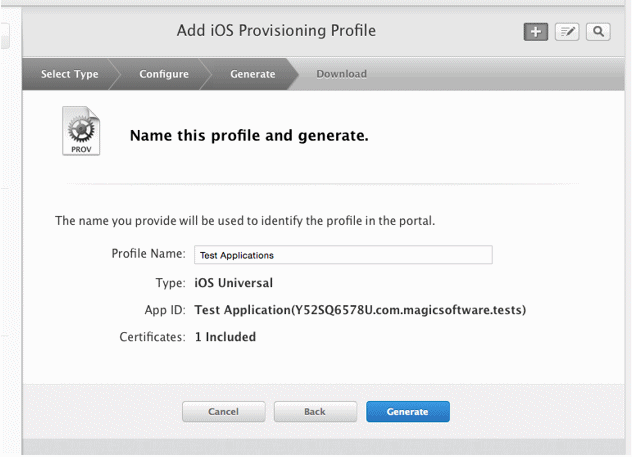
Enter the name of this profile for record-keeping purposes and click Generate.
-
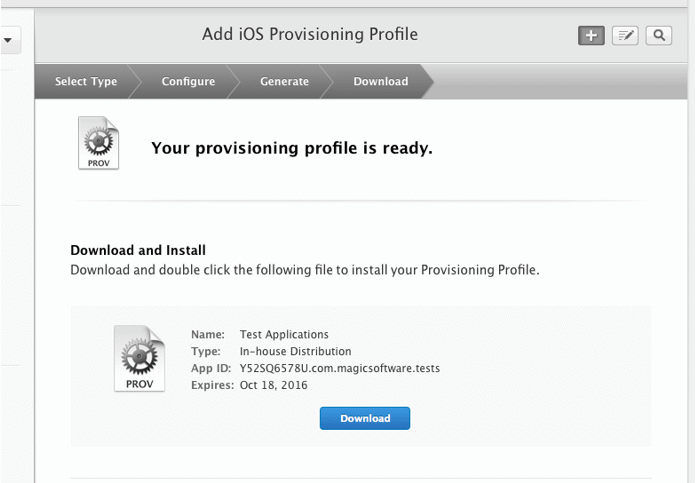
Click Download to download the .mobileprovisions file to your development machine.
-
Double-click the downloaded .mobileprovisions file to install the provisioning profile in your Xcode environment.
How Do I Manually Change the iOS Project to Compile It Using Xcode?

