Configuring IIS 7 to Work with Magic xpa (Magic xpa 4.x)
When installing Magic xpa on a machine (workstation/server) that has IIS 7 installed on it, the installation will add the necessary aliases and permissions to the IIS.
|

|
If the Default Web Site does not exist in IIS, the Magic xpa installation does not create the required settings. In this case, you will need to manually create the aliases.
|
However, if IIS was not installed or if you want to add Magic xpa components for Web/RIA purposes, then you need to add IIS components and configure it.
-
Prerequisites:
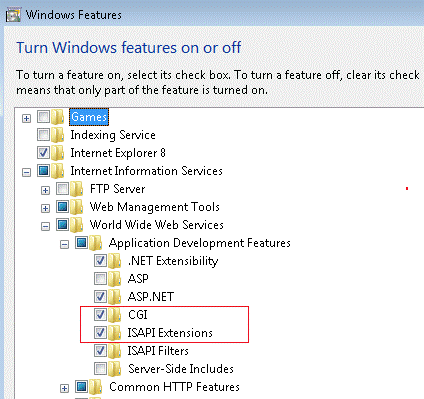
a. To work with the broker, make sure that while installing IIS 7, you selected to install the CGI and ISAPI Extensions options from the IIS > WWW Services > Application Development Features. You open the screen below by going to the Control Panel, selecting Programs and Features and then selecting the Turn Window features on or off option from the left side of the window.
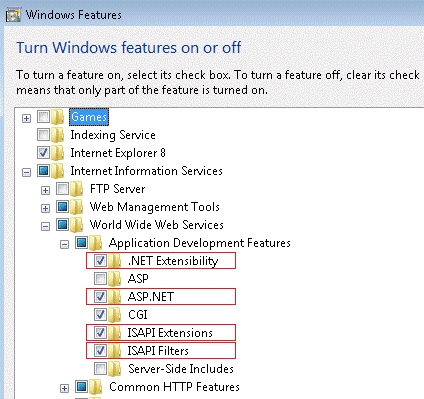
b. To work with GigaSpaces, make sure that while installing IIS 7, you selected to install .NET Extensibility, ASP .NET, ISAPI Extensions and ISAPI Filters from the IIS > WWW Services > Application Development Features. You open the screen below by going to the Control Panel, selecting Programs and Features and then selecting the Turn Window features on or off option from the left side of the window.
Note that selecting ASP .NET selects all of the other options by default.
-
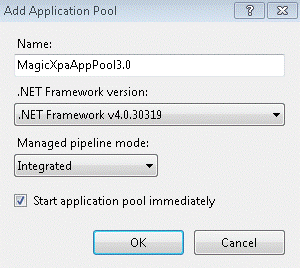
In IIS, create an application pool named MagicXpaAppPool3.0 for .NET Framework v4.0.
-
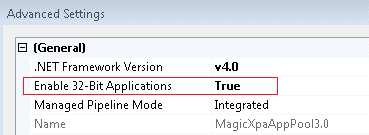
If the machine has a 64-bit operating system, go to the Advanced Settings of this application pool and set Enable 32-Bit Applications to True.
-
In IIS, create an application, for example, MagicScripts for the Script folder and set MagicXpaAppPool3.0 as the application pool.
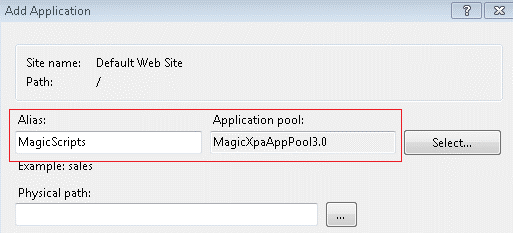
Magic xpa installs web.config file in the scripts folder.
5. After creating the alias (virtual directory) for the Script folder, do the following to work with the broker:
a. Park on the alias and double-click Handler Mappings.
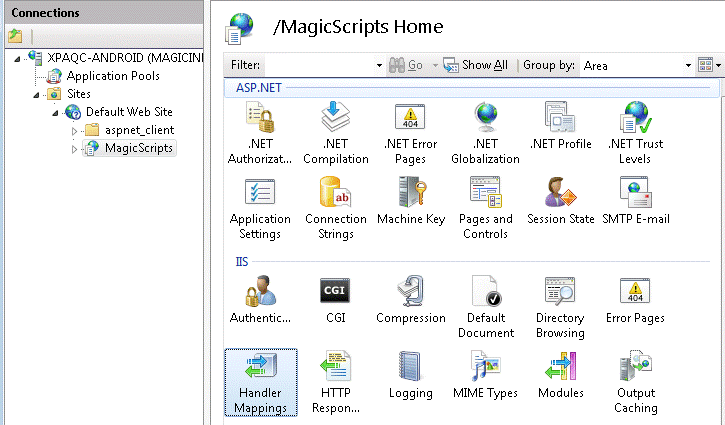
b. Select ISAPI-dll.
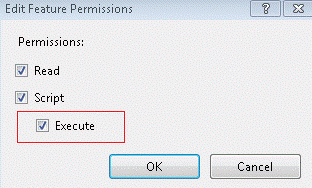
c. Click Edit Feature Permissions.

d. Select Execute.
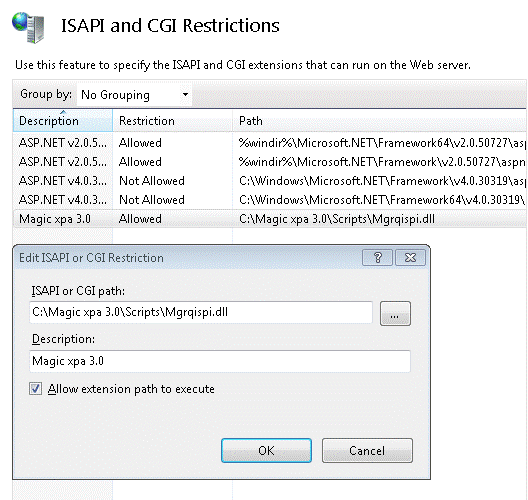
6. To work with the broker, assign the execute right to the MGrqispi.dll and MGrqcgi.exe files:
a. Go to the Root (which would be the machine name) in the Connections window.
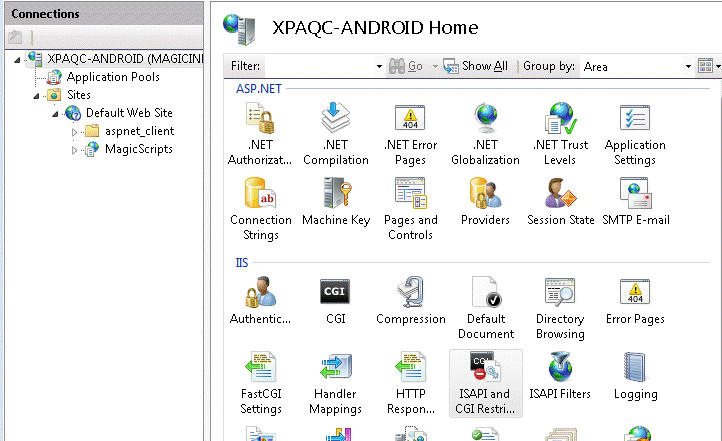
b. Double click ISAPI and CGI Restrictions.
c. In the Actions window, click Add.
d. Provide the path of the MGrqispi.dll or MGrqcgi.exe file and the Description.
e. Select Allow extension path to execute.
7. Restart IIS.
-

