Working with Source Tree
Sourcetree (https://www.sourcetreeapp.com) simplifies how you interact with Git repositories so you can focus on coding. Sourcetree's simple Git GUI makes visualizing, managing, merging branches operations on the local and remote repositories easy. One can use Sourcetree as an alternate for maintaining and merging the Git branches especially if they are looking for merging individual commits that could not be possible using the Magic xpa Pushok Git-plugin.
For working with Sourctree, it is recommended that you go through this useful link https://confluence.atlassian.com/get-started-with-sourcetree
SourceTree Installation and Configuration
Let us see, how you can install the Sourcetree and configure with Magic Merge tool.
-
Download and install Sourcetree from: https://downloads.atlassian.com/software/sourcetree/windows/ga/SourceTreeSetup-2.4.8.0.exe?_ga=2.240004992.262808930.1521107119-1195951924.1519913063
-
After the installation, you will need to setup Sourcetree with Atlassian community account. The comprehensive steps to setup are provided at Sourceree Getting Started link.
-
After successful setup of SourceTree follow the steps mentioned in below links for
· Connect your Github account
· Clone a remote repository
4. By now, you have configured your Github project with Sourcetree.
Next, let us know how to configure Magic Merge Tool with Sourcetree.
Configuring Magic Merge Tool
Since the Magic xpa source files are different than code files, you should use the Magic Merge tool as the merge tool. Configure Magic Merge in Sourcetree as follows:
-
Open the Sourcetree.
-
Go to Tools -> Options from menu.
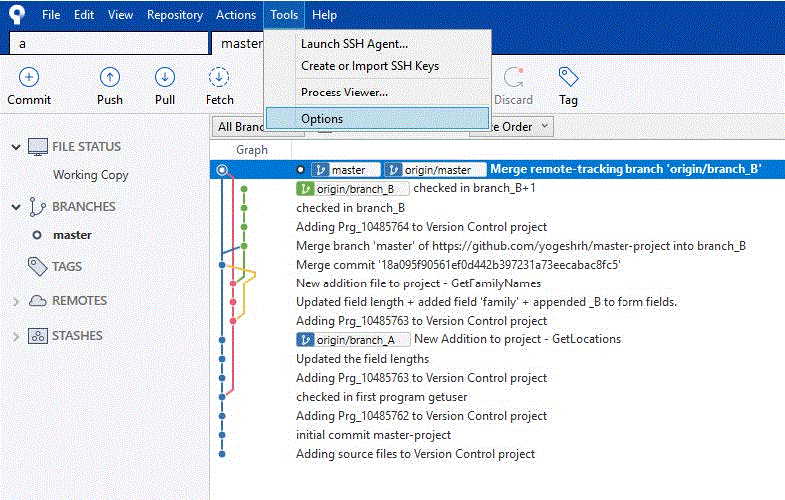
3. Click Options to open the options window.
4. Navigate to Diff section where Merge tool needs to be configured.
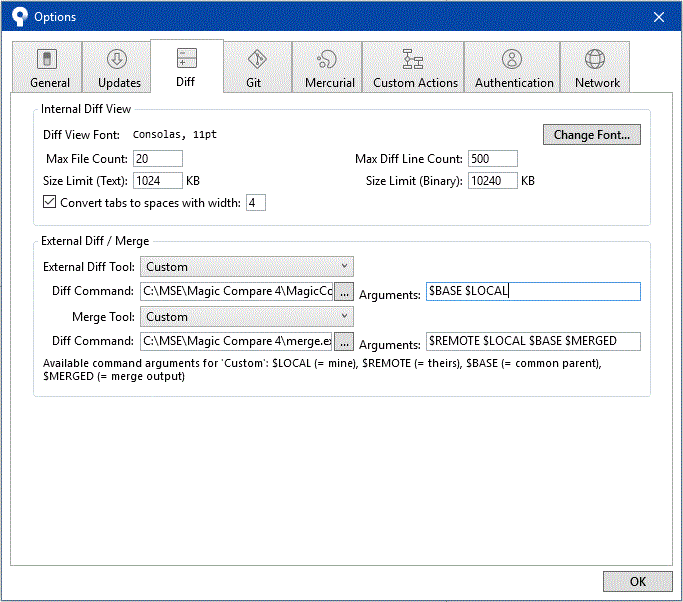
5. Define the following in the External Diff/ Merge section:

· Merge Tool = Custom
· Diff Command = <Magic Compare 3 Install Dir>\merge.exe
· Magic Merge tool (merge.exe) path which comes bundled with Magic xpa
· Arguments = $REMOTE $LOCAL $BASE $MERGED
6. Click OK to save the settings.
Merge Operation of Sourcetree
This is how you can perform merge operation using branches and individual commits to branches:
1. Open your Github project in Sourcetree UI.
2. Checkout the master branch or the main branch OR Perform a fetch operation to get the latest.
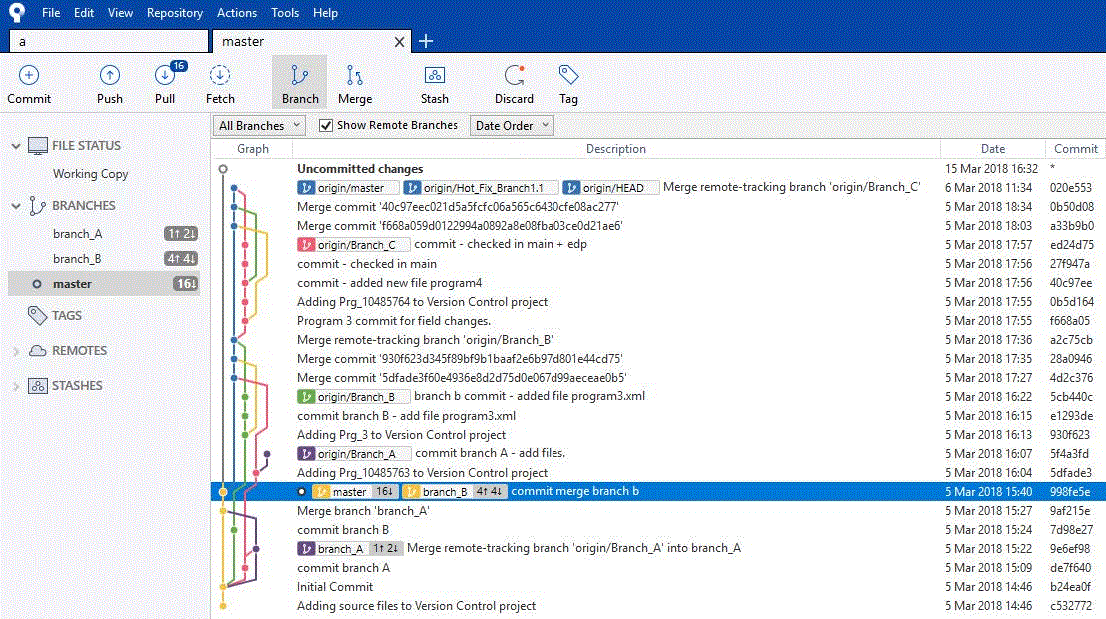
3. You will see a graphical view of all the commits historical actions that have taken place within the project with different branches.
4. All the other branches are displayed on the left side under BRANCHES section (master, branch_A, branch_B)
5. Select the main branch (master) in the above case.
6. Merge separate branches and individual commits are shown below.
Merging Two Separate Branches
You can merge a separate branch into the main or master branch. To do this:
-
Right-click on the master branch. You will get to see the following options menu.
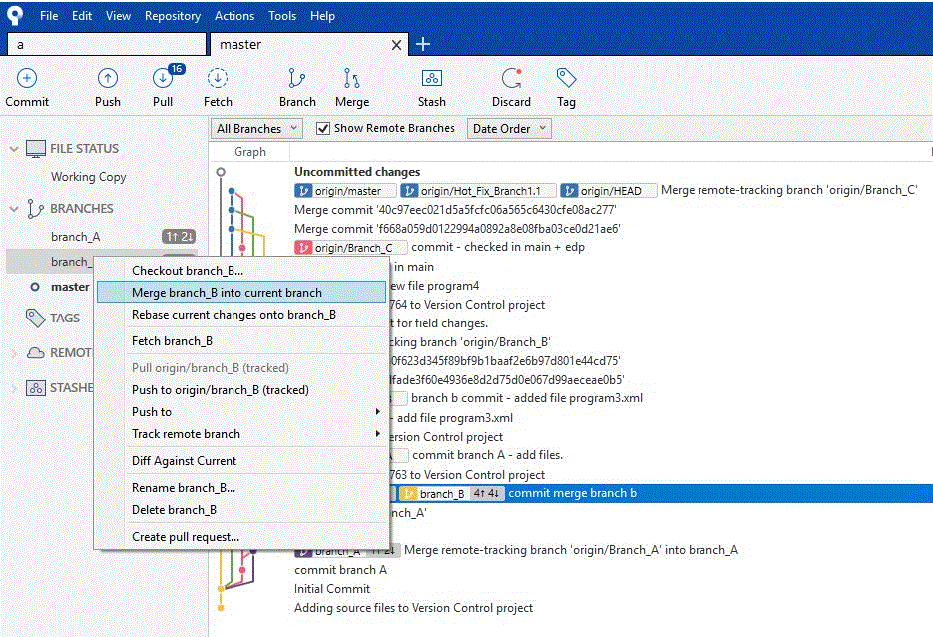
2. Select Merge branch_B into current branch option. Here, you will be asked for confirmation for merge.

3. Click OK to finish the operation.
Merging Individual Commits to a Branch
-
You will get to see the commit history that has taken place as shown below:
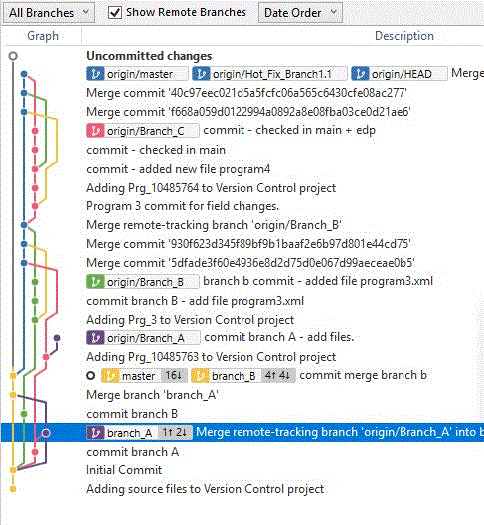
2. To merge individual branch commits, select an item from the list of commits.
3. Right-click to see the merge options.
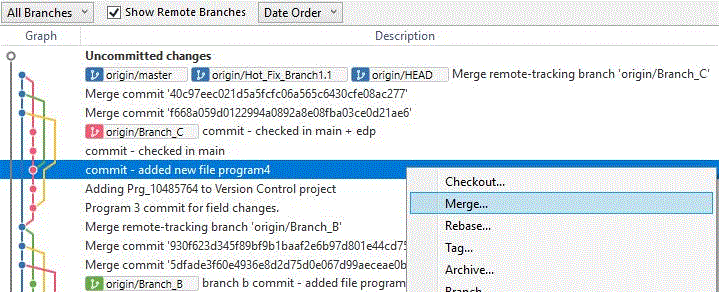
4. Click Merge… for the selected commit changes. Here, you will be asked for confirmation for merge.

5. Click OK to complete the operation.
6. In case of a conflict during the merge operations you will get an alert message to resolve it.
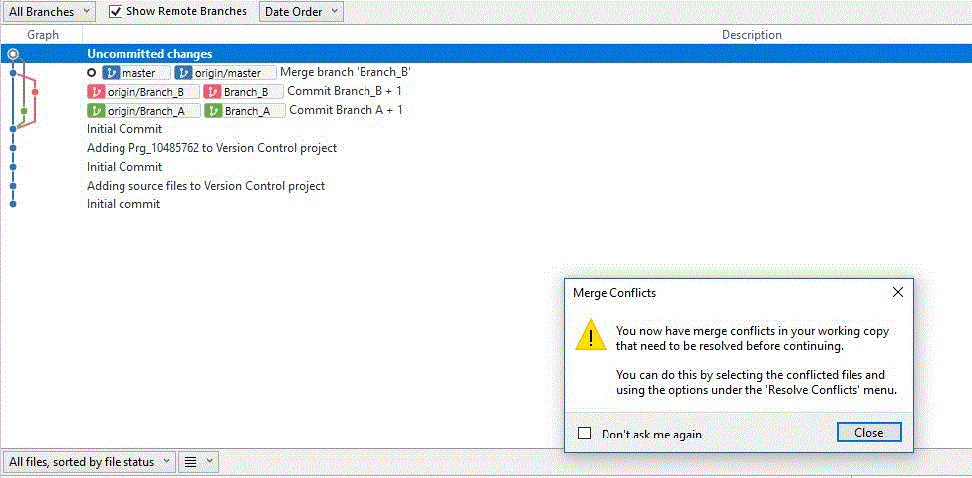
7. You can resolve conflicts using two ways:
· by going to menu, Actions -> Resolve Conflict -> Launch External Merge Tool.
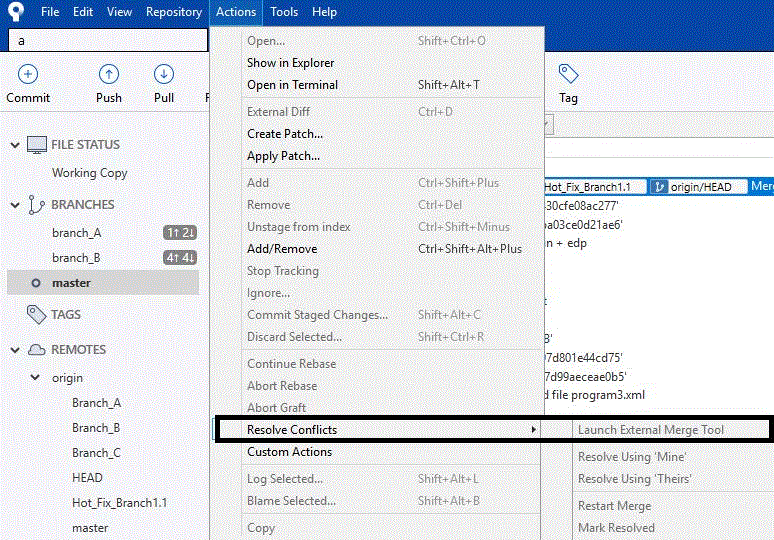
· by exploring the working copy, selecting the conflicting file(s), and launching the Merge tool.
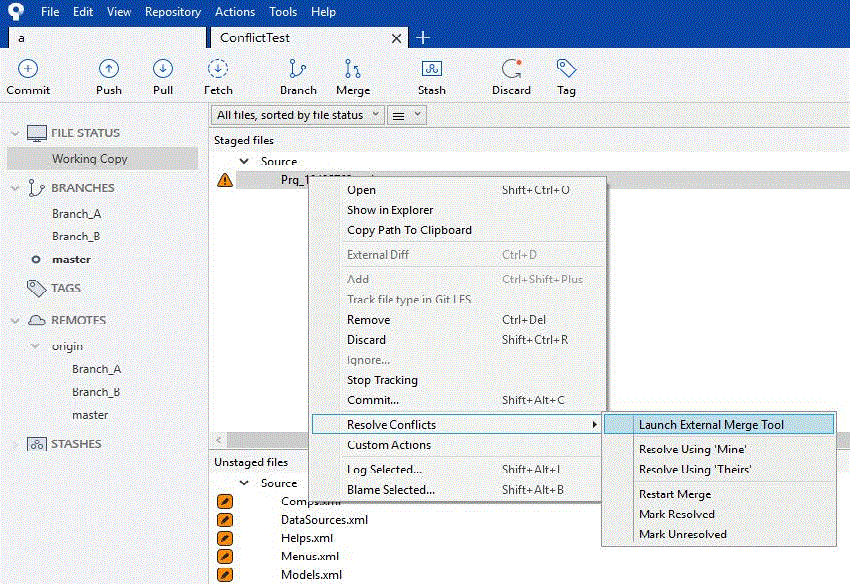
8. Magic Merge tool will be invoked at this point. The conflict resolution is similar as mentioned in section Merging with Magic Merge Tool -> Merge_Operations_point_number_9.
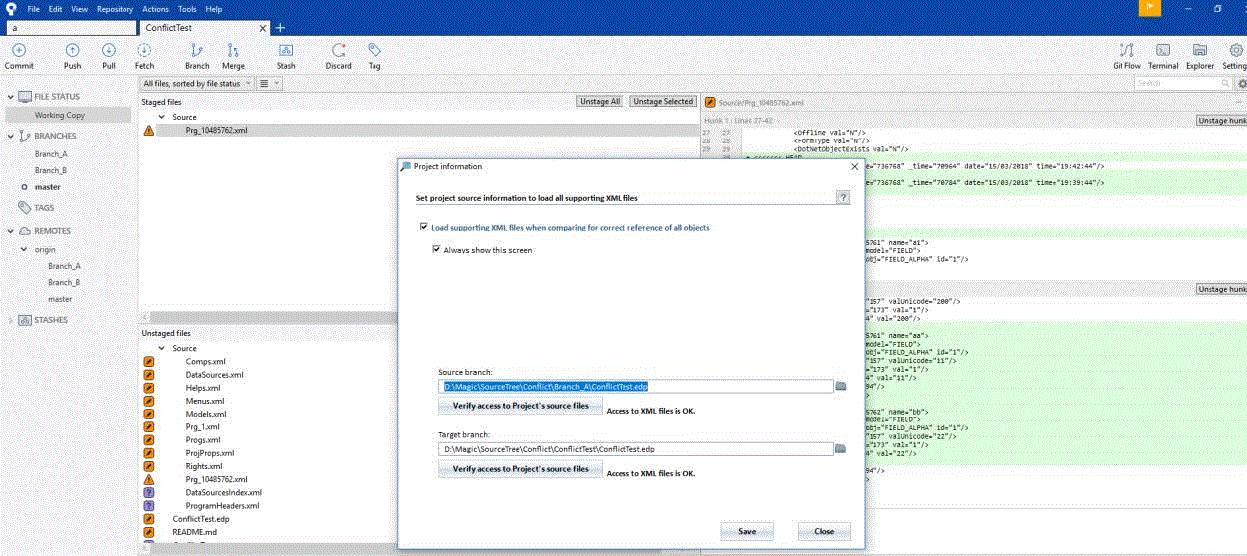
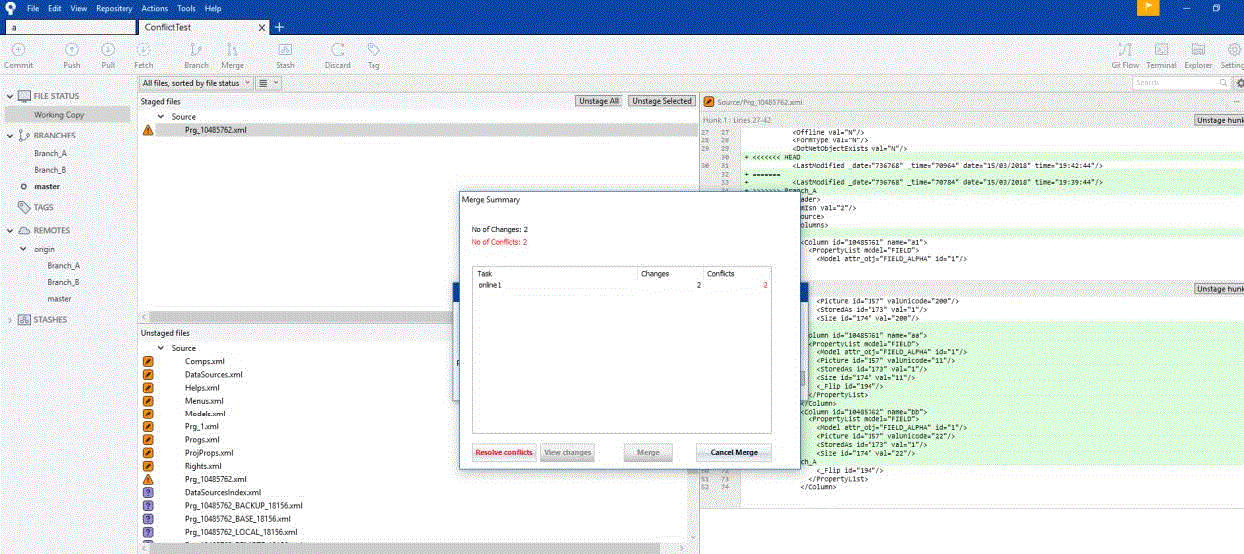

9. Once you have merged successfully, you need to perform the push operation to update the changes to remote repository.
Merge using Cherry Pick option
-
You will get to see the commit history that has taken place as shown below:
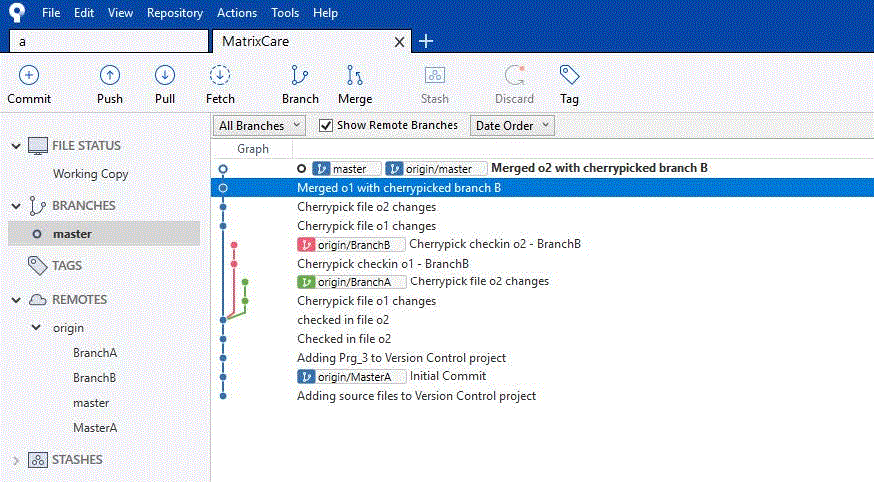
2. To merge the commits, select an item. Right-click to see the Cherry Pick option.
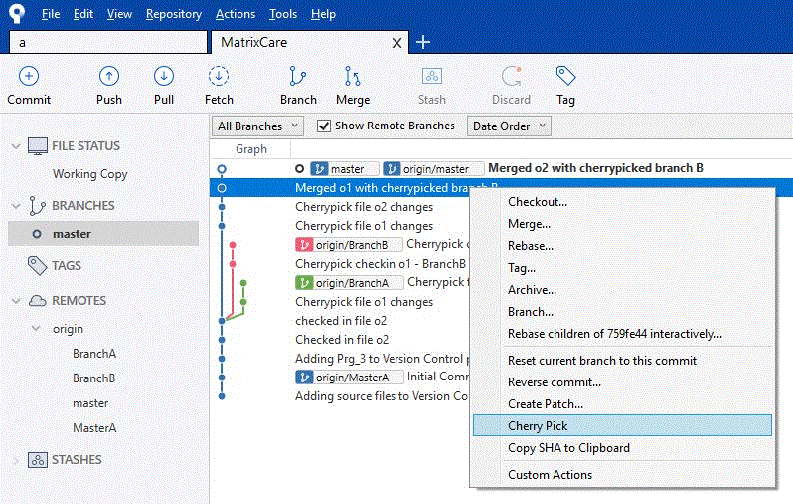
3. Confirm the Cherry Pick to apply the selected change on your current branch.

4. In case there are no conflicts, the changes are merged and committed immediately otherwise the merge tool will be invoked. Once changes are merged make sure you commit the changes. In both cases, you have to push your commits to the main branch for the changes.
Introduction to Git
PushOk Git Plugin
PushOk Installation and Configuration
Creating Remote Git Repository
Branching with Git
Merging with Magic Merge Tool
Connecting Magic xpa with Git Repository

